Ayurved Doctor

Categories
Yoga

Salabhasana : Yoga Pose

Salabhasana is known as locust or grasshopper posture, since Salabha means locust or grasshopper in Sanskrit. It is grouped with Dhanurasana and they are described as baby backbends. Even though it appears simple and unassuming, it is actually quite challenging and interesting than what it looks like. Usually, Salabhasana is considered as a good counter-stretching asana for Paschimottanasana, Sarvangasana and Halasana.

Procedure for Salabhasana

  1. Place a folded blanket to pad your pelvis and ribs from the ground. You should lie down on the blanket with your belly on the blanket. The arm should be kept to the sides of your body, with the palms up and forehead resting on the ground. You should turn your big toes inwards so that your thighs get rotated. The buttocks should be kept firm to enable your coccyx to be pressed to your pubis.
  2. You should raise your head, arms, upper chest and legs away from the floor or the blanket. Your body will be resting on your belly, front pelvis and lower ribs. You should ensure that you keep your buttocks firm and the legs are fully stretched. The big toes should remain turned to face each other.
  3. You should raise your hands until they are parallel to the floor and stretch them actively backwards. You can imagine that some weight is pushing down on the upper arms and you are pushing up against this particular resistance. The scapulas or shoulder blades should be firmly pressed into your back.Salabhasana Yoga Pose
  4. You can look either directly forward or tilt your head a little upward, but you should ensure that the chin does not get pushed forward, putting pressure on the nape of the neck. You should keep the back of the neck long and only lift the base of your skull.
  5. You can remain in this posture between 30 seconds to one minute. You should exhale and return back to your lying position. You can perform this asana a few times again, with a gap of one or two minutes. The focus of Salabhasana is not on how high you are able to lift up, but on how much you are lengthening your spine.

Benefits of Salabhasana

Salabhasana improves the flexibility in your back and strengthens the muscles in your lower back, spine, backs of your arms and legs and your buttocks. It stretches the thigh, belly, chest and shoulders. It improves digestion and massages the internal organs. It is particularly useful for persons suffering from sciatica and lower back pain, since it provides great relief for both conditions, if practiced slowly and properly. It strengthens the arm and shoulders. It reduces fatigue. Therapeutically, Salabhasana enhances concentration, stimulates the Swadhisthana Chakra. The anatomical focus of this asana is on the neck, upper arms, upper back, lungs, lower back, hamstrings and calves and buttocks. Salabhasana relieves flatulence, indigestion and constipation. It relieves stress.

Precautions and Contraindications for Salabhasana

Persons suffering from headaches, serious back injury and neck injury should not practice Salabhasana.

Preparatory and Follow-Up Asanas

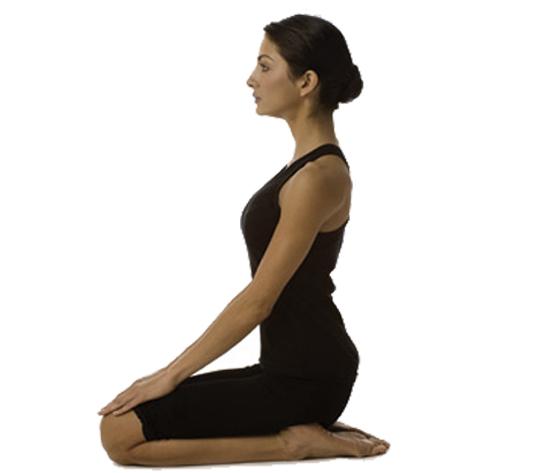
The preparatory asanas for Salabhasana are Bhujangasana, Gomukhasana, Setu Bandha Sarvangasana, Supta Virasana, Virabhadrasana I, Urdhva Mukha Svanasana and Virasana. The follow-up asanas are Setu Bandha Sarvangasana, Salamba Sarvangasana and Bharadvajasana. It is always advisable to do Salabhasana and other asanas under the monitoring and guidance of an expert yoga master. You can avoid injuries when a master is supervising you. You should also do this asana only on a folded blanket and never on the ordinary floor.

Categories
Yoga

Sirasasana : Yoga Pose

Sirasasana is standing on the head posture. Since you use your hands as support, this asana is also termed as Salamba Sirasasana or supported headstand posture.

Procedure for Sirasasana

  1. You should use a folded blanket to provide padding or cushion to your forearms and head. First, you should kneel on the floor. You should clasp the fingers of both hands together and place your forearms on the ground, with the elbows remaining at shoulder width. You should roll your upper arms forward slightly and press your inner wrists into the ground firmly. You should place the crown of your head on the ground. Beginners should press the bases of their palms together, while snuggling the back of their head against clasped hands. After gaining experience, you can open your hands and place the back of your head into your open palms.
  2. You should inhale and slowly lift your knees from the ground. Your feet should be close to your elbows with elevated heels. You should now lift actively through the top of your thighs in an inverted ‘V’ form. The shoulder blades should be firm against the back and you should lift the shoulder blades towards the tail bone to keep the chest front. This will prevent the weight of your shoulders from collapsing on your head and neck.
  3. You should exhale and lift your feet more away from the ground, with both feet together. If necessary, you can bend your knees during this time. You should lift the legs (or the thighs if you have bent your knees) in a perpendicular position to the ground, keeping the tail bone firm against the back of your pelvis. You should turn your upper thighs slightly inward and press the heels actively towards the ceiling. If you had bent the knees, you should straighten them now. The center of your arches, the center of your pelvis and the center of your crown should be in alignment.
  4. You should firm up the outer arms inwards and soften your fingers. You should continue the press of your shoulder blades against your back, while widening the shoulders and drawing them towards your tailbone. Your body weight should be evenly balanced on your two forearms. Your tailbone should continue its upward lift towards your heels. When the back portions of your legs are completely lengthened through your heels, you should maintain that lengthening and press upward through the balls of your big toes, so that your inner legs are marginally longer than the outer legs.
  5. Beginners should maintain this position only for 10 seconds. You can slowly add 5 or 10 seconds every week until you are comfortable in this posture up to 3 minutes. After a few weeks, you can add 5 or 10 seconds each day. You can stay in this position as long as you are comfortable. You should finally come down slowly while exhaling and you should not lose the lift of your shoulder blades. Both feet should touch the ground at the same time. The lifting and bringing down your legs should be smooth and not jerky. Initially, this may not be possible for beginners, but they will get perfection with constant practice. You can remain in Sirasasana even up to 20 or 30 minutes, but you should ensure that you are absolutely comfortable.
  6. After resting for 5 minutes, you should drink a cup of milk, which is very important. You should not remain for long periods in Sirasasana in summer, but you can extend the time during winter.

Sirsasana Yoga Pose

Benefits of Sirasasana

Sirasasana calms your brain and relieves stress as well as mild depression. It stimulates the pineal and pituitary glands. This asana strengthens your arms, legs, lungs, and spine. Sirasasana also tones up the abdominal organs. It is therapeutic for insomnia, asthma, sinusitis and infertility. Sirasasana is highly useful in maintaining Brahmacharya and prevents wet dreams or spermatorrhoea. It invigorates, vivifies and energizes. Memory power increases by the practice of Sirasasana. The head receives lots of blood and Prana.

Swami Shivananda of Divine Life Society, Rishikesh has mentioned that Sirasasana can cure all diseases related to eye, head, nose, stomach, throat, liver, lungs, spleen, genitor-urinary system, gonorrhoea, syphilis, deafness, renal colic, piles and diabetes. Many ovarine and uterine diseases of women get cured. It relieves symptoms of menopause. Swami Shivananda has asserted that Sirasasana, Sarvangasana and Paschimottanasana are enough to keep a person completely healthy and other asanas need not even be practiced. These three are so powerful and important, according to him.

Precautions and Contraindications for Sirasasana

Persons suffering from back injury, heart condition, headache, high blood pressure, neck injury and low blood pressure should not practice this asana. Women should avoid Sirasasana during menstruation and pregnancy. You can do Sarvangasana before Sirasasana, though a few yoga schools reverse this order.

Beginners should practice this asana only under the guidance of an experienced yoga master. Otherwise, they can initially practice this by remaining close to a wall so that they do not fall on their backs. When they rest their legs on the wall, they will not be in a perpendicular position, but it will be easy for them to come to a straight position without too much difficulty. With practice, they will be able to reach the correct position without the support of the wall.

Variation of Sirasasana

The variation of Sirasasana is Eka Pada Sirasasana or one leg headstand posture. After reaching and getting stabilized in the Sirasasana position, you should exhale and lower the right leg until it is parallel to the ground, but your left leg should be firm and remain perpendicular to the ground. You can hold this position for up to 30 seconds and lift back the right leg to the perpendicular position, inhaling. You can repeat this with your left leg for the same period.

Preparatory an Follow-Up Asanas

The preparatory asanas for Sirasasana are Sarvangasana, Adho Mukha Svanasana, Uttanasana and Virasana. The follow-up asanas are Balasana and Adho Mukha Svanasana.

Categories
Yoga

Gomukhasana : Yoga Pose

Gomukhasana is known as cow face posture, since Go means cow in Sanskrit and Mukha means face. You can do this asana easily in a sitting posture.

Procedures for Gomukhasana

  1. You should sit in Dandasana or staff posture.
  2. You should bend your left leg and bring the heel of the left leg under the right leg, close to the right hip.
  3. You should bend your right leg now over your left knee, allowing your right heel to come close to your left hip. Your right knee should be in a position directly above your left knee.
  4. You should place your palms of both hands on your feet.
  5. You should press your sitting bones onto the ground and you should keep your head straight so that the crown points towards the ceiling.
  6. You should bend your left elbow and move your left forearm to bring it behind your back.
  7. The back of your left hand should be positioned in the middle of the back, very close to the shoulder blades. Your left forearm and the fingers of your left hand should be pointing upward.
  8. You should extend your right hand over your head, while inhaling.
  9. You should bend the right elbow and bring the right elbow between your shoulder blades. The right palm should be facing your back and the fingers of your right hand should be pointing downward.
  10. You should now clasp the fingers of your left hand with the fingers of your right hand.
  11. You should pull the shoulders away from one another and experience the stretch in your shoulders. You should also open up your chest.
  12. You can remain in this posture between 10 and 30 seconds before you release your hands and come back to Dandasana.
  13. You should repeat the steps between 2 and 12 for your other side.

Gomukhasana Yoga Pose

Precautions

You should not do this asana if you are suffering from any problems in the knee, hip, neck, and shoulders.

Benefits of Gomukhasana

Gomukhasana releases the tension in your shoulders. It stretches your arms and shoulders. It opens up the chest, facilitating deeper breathing. It is also useful in the elimination of rounded shoulders. When you deepen this asana, breathing becomes easier and headaches get relieved. The anatomical focus of Gomukhasana is on your ankles, hips, thighs, shoulders, arms and chest.

Variations in Gomukhasana

You can do this asana from a sitting position, but you can perform the stretch of the upper body in standard sitting position or in Vajrasana or thunderbolt posture. If you are unable to clasp your hands behind your back, you can hold a strap between the hands. You can also pull your abdominals towards your spine, bend forward at the hips and press your chest gently to the floor. It is advisable to learn this asana and other asanas under the supervision of a trained yoga master.

Preparatory and Follow-Up Asanas for Gomukhasana

You can practice Baddha Konasana, Upavista Konasana, Virasana, Supta Virasana, Supta Padangustasana and Supta Baddha Konasana before starting on Gomukhasana. You can follow up Gomukhasana with Ardha Matsyendrasana, Garudasana, Marichyasana III, Paschimottanasana, Bharadvajasana, Upavista Konasana and Padmasana.

Categories
Yoga

Vajrasana : Yoga Pose

Vajrasana is known as thunderbolt posture, since vajra means thunderbolt in Sanskrit. It is also termed as adamantine posture. If you practice Vajrasana, you have a firm, steady pace and you cannot be easily shaken. Vajrasana renders the knees very hard. The spinal cord or Meru Danda becomes strong and firm. This asana nearly resembles the Namaz posture that Muslims adopt when they sit for prayer.


Procedure of Vajrasana

  1. Come down slowly from a standing position or Tadasana by bending your knees, but keeping your back and neck straight and erect.
  2. When your thighs touch the forelegs and the forelegs are firmly on the ground, twist your feet so that the soles support the buttocks and the feet extend beyond the buttocks, with the fingers of the feet stretching outward.
  3. The calves of the legs should touch the thighs and the part of the knee to the toe should touch the floor. The entire weight of the body is borne by the knees and ankles.
  4. When you are sitting in the proper position comfortably, place your hands on the knees, keeping the knees quite close. The back, neck and the head should be in a straight line.vajrasana Yoga Pose
  5. Initially, you may feel a little pain in the knee joints and ankle joints, but this will disappear with practice. You can massage the knee joints and ankle joints with your hands until you feel comfortable.

Benefits of Vajrasana

Vajrasana is a very good asana to counter indigestion. If you sit after taking your food in Vajrasana for about 30 minutes, the food will become well digested. Dyspeptics can derive a lot of benefit from this asana. The muscles and the nerves of the legs and thighs get strengthened by Vajrasana. If you are suffering from myalgia in your thighs, legs, knees, and toes, you can eliminate myalgia with Vajrasana. You can also use this asana as a cure for sciatica and flatulence.  Vajrasana helps in making the stomach work vigorously. Vajrasana exercises a beneficial, stimulating influence on Kanda. Kanda, a very vital part of our body is located 12 inches above our anus and the 72,000 Nadis in our body spring forth from Kanda. With practice, you can sit in Vajrasana for a long time. Yogis and siddhas use Vajrasana for meditation.

Variation of Vajrasana

You can also keep your heels separate. You can keep the buttocks and the anus between the heels and keep the legs by the sides of the two thighs.

If you keep your hand on your knees, hips, or the sides of your chest and press your buttocks firmly with the soles, with the trunk, neck and head straight and erect, it is known as Kurmasana or tortoise posture.

If you sit in Vajrasana and stretch the hands to the face level with palms facing together, while bending down slowly and lying down on the floor with the support of your hands, it is Ardha Kurmasana.

For performing Utthana Kurmasana, you should sit in the position of Garbhasana with the hands between the thighs and the calves. While you keep the feet on your thighs in Garbhasana, you keep the ankles close and one ankle over the other ankles, while pressing the head down with the hands. These asanas eliminate pain and sprains in the back.

When you take the feet towards the back, allowing the toes to touch each other, with the knees at the sides and the hands on the knee, it is known as Mandukasana or frog posture.

When you raise your knees slowly while sitting in Vajrasana, you will be performing Angushthasana, which is very helpful in maintaining Brahmacharya.

When you sit in Vajrasana and take hold of your heels with your two hands, it is known as Ananda Mandirasana.

Supta Vajrasana

Supta Vajrasana is a major variation of Vajrasana by combing Vajrasana with Savasana or sleeping posture. It is also known as Ardha Savasana. You should perform this asana only after obtaining perfection in Vajrasana, since more force and strain come on your knees in this asana. You should lie down on your back and make a finger-lock. The head should rest on your palms. At the beginning, the entire portion of your back will not be able to touch the floor and the lower portion will remain in a raised position. However, you will get perfection in this asana with practice. This asana provides all the benefits of Vajrasana. Even hunchback can be removed by this asana since the spine bends backward and becomes elastic. When you perfect this asana, performing Chakrasana becomes easier.


Categories
Yoga

Simhasana : Yoga Pose

Simhasana is known as lion posture, since simha is lion in Sanskrit and this asana looks like a seated lion. The practitioner should modify the facial expressions to resemble the lion to get maximum effect from this asana. Simhasana is a sitting posture yoga exercise.

Procedure for Simhasana

  1. You should kneel on the ground and sit in the position of Vajrasana. You can either do this in Vajrasana position or you can cross the front portion of your right ankle over the back portion of your left ankle. In this position, the feet will be pointing out towards the sides. You should sit back, so that your perineum is positioned snugly down on the top heel, which will be the right heel.
  2. You should press the palms of your hands against your knees firmly. You should splay your fingers and fan the palms, so that they look like the sharp opened claws of the lion. While doing this, you should feel how the shoulder blades spread across your back and press it firmly, which lifts the position of your heart.
  3. In this position, you should inhale deeply through your nose. At the same time, you should open your mouth as wide as possible and stretch out your tongue, so that the tip of the tongue curls down towards your chin. You should keep your eyes wide open and contract the muscles in the front portion of your throat. You should now exhale slowly through the mouth with a unique ‘ha’ sound. The breath must pass over the back portion of your throat.
  4. For this asana, some yoga schools advice that your gaze should be bhru-madhya-drishti or mid-brow grazing, keeping your eyes focused between your eyebrows. Other yoga schools teach that the focus of the eyes should be the tip of your nose or nasa-agra-drishti.
  5. You can even roar like the lion two to three times. Then you should change the crossing of your legs and repeat this asana. You can do both positions any number of times as long as you are comfortable and does not feel any strain.

Simhasana yoga pose

Benefits of Simhasana

The anatomical focus of Simhasana is on the knees, ankle, diaphragm, abdomen, chest, hands and fingers. Simhasana relieves tension in your face and chest. Very few people are aware that Simhasana stimulates the platysma, which is a thin, fat and rectangular-shaped muscle situated on the front portion of the throat. When you contract the platysma, it puts a downward pulling pressure on the corners of your mouth, while the skin of the neck becomes wrinkled. This process of Simhasana keeps the platysma firm even when we age. Further, Simhasana is believed to destroy diseases, while facilitating the three major bandhas, namely, Mula Bandha, Jalandara Bandha and Uddiyana Bandha. Most yoga schools agree that Simhasana is highly effective for people suffering from stuttering or those with bad breath.

Precautions for Simhasana

You should be very cautious when you begin to sit in fixed-knee position, if you are suffering from any knee injury. In such a situation, you can sit in a chair and practise this asana.

Variation of Simhasana

You can sit in the position of Mandukasana or frog posture and sit back on the knees. The buttocks should be wiggled down towards the inner arches of your feet, so that they form a kind of saddle. You should now spread your knees as wide as possible, while the inner tips of the big toes are touching. You should lean your chest forward, while pressing the palms of your hands on the ground between your legs, with the fingers turned back to point at your pelvis. Your elbows should remain straight during this exercise. You should then perform step 4 described above.

Categories
Yoga

Marjaryasana : Yoga Pose

Marjaryasana is known as the cat posture, since Marja means cat in Sanskrit. It is a highly popular and frequently performed asanas in the world. The postures that we maintain in our daily lives determine our overall health and well-being. Marjaryasana is highly effective in correcting many of the wrong postures that we assume during many occasions, thereby enhancing our body health.

When the body is healthy, mind also functions clearly and remains active. However, you should practice this asana and other asanas under the guidance of an experienced yoga master, since performing the steps accurately is very important to obtain maximum benefits from each asana. Any wrong steps or movements will result only in pain or injury, which should be avoided. The movements in any asana should be smooth and slow, without any sudden or jerky movements.

Procedure for Marjaryasana

  1. You should first get yourself into a kind of table top position, keeping your hands and knees on the ground. The knees should be directly below your hips. The shoulders, elbows and wrists should be perpendicular to the ground and in a straight line with each other. You should keep your head in the center between your shoulder and the focus should be firmly locked on the ground.Marjaryasana yoga pose
  2. You should now exhale and raise the spine towards the ceiling by rounding it. Your hands and knees should remain in the original position and should not move during this exercise.
  3. You should release and lower your head towards the ground, but the chin should not touch your chest. You can remain in this posture as long as you feel comfortable.
  4. You should slowly return back to the original table top position while inhaling. You can repeat this asana any number of times you want.

Precautions and Contraindications for Marjaryasana

Marjaryasana may be easy for some people, but others may find it slightly difficult. Hence, you should ensure that you do not feel any pain or strain while doing this asana or any other asana. You should keep the movement within your ability and capacity and should never push beyond that limit. If you have been suffering from any head injury, you should not lower your head but keep it straight in line with your chest. You should always perform preparatory asanas, so that you are able to flex your body muscles when you perform each asana, especially the intermediate and advanced or tougher asanas.

Benefits of Marjaryasana

Marjaryasana provides sturdiness and overall durability to your spinal column. This asana not only plays a key role to correct the posture of an individual, but also invigorates the spine and internal organs. It relieves tension in the lower back. Very few people know that Marjaryasana also plays a significant role in purifying the blood and regulating the blood circulation in the human body. It is a very good stress releasing workout and hence, it is used widely as a very good stress reliever, since stress is one of the major issues in the lives of most of us.

Variation in Marjaryasana

While remaining in Marjaryasana, you can turn your head to focus the eyes on your left hip, while moving the hip slightly towards your head. You should repeat it towards the right side, but you should breathe in before changing the position. You can do this variation for 10 or 15 breaths. You can also move your hands to a more forward direction and move the hips in a slow circular motion.

Preparatory and Follow-Up Asanas for Marjaryasana

The preparatory asanas for Marjaryasana are Balasana and Garudasana. The follow-up asana is Gomukhasana but your yoga master will be able to teach you other preparatory and follow-up asanas.

Categories
Yoga

Ardha Matsyendrasana : Yoga Pose

Ardha Matsyendrasana is known as the half lord of the fish posture, since Ardha in Sanskrit means half, Matsya means fish and Indra is divine ruler. Matsyendra was a legendary Yogi, who taught this asana first to Hatha Yoga students. It is believed that Yogi Matsyendra was a disciple of Lord Shiva.

Once Lord Shiva went to a lonely island with his consort, Goddess Parvati and he taught her the mysteries of Hatha Yoga there. A fish swimming at the shore nearby heard all the teachings of Lord Shiva and Shiva recognized this. He took mercy on the fish and sprinkled holy water on the fish. By the grace of Shiva, the fish became a Yogi with a divine body and earned the name Matsyendra. This asana is a half posture and a spinal twist asana.

Procedure for Ardha Matsyendrasana

  1. You should sit with your legs straight on a blanket or a yoga mat and the legs should be spread outwards. You could use an additional folded blanket to support your buttocks for more comfort.
  2. You should now slowly slide the left foot under the right leg, so that you are able to reach the outside of your right hip with the left foot. You should keep the outside of your left leg on the ground after sliding it.
  3. You should now cross the right leg over your left leg so that it stands on the floor outside the left hip. The right knee should be pointing towards the ceiling.Ardha Matsyendrasana Yoga Pose
  4. You should keep your right hand behind your buttocks and press it on the ground. Simultaneously, you should twist towards the direction of the inner portion of your right thigh, while exhaling. Your left upper arm should rest on your right knee pointing towards the ceiling. You should pull your chest and the right thigh together.
  5. You should press your inner right foot into the ground, while releasing your right groin simultaneously. You should also lengthen your right chest area. You should continue the lengthening of your tailbone, while leaning the upper chest slightly backwards.
  6. You can turn your head either towards the right or left. You can continue to twist your chest with the head or you can counter twist the chest in the opposite direction. You should be looking over your left shoulder towards your right foot if you are turning your head towards the left.
  7. You should lift a little through your sternum with each inhaling breath. You can press your fingers against the ground for support. You should more with each exhalation. You should ensure the twist is spread evenly throughout your spine, instead of getting concentrated in any specific area of your spine. You can stay in this pose between 30 seconds to a minute and slowly release the position with exhalation to return to the original position.
  8. You should repeat this asana for your left side and follow the same procedure.

Precautions and Contraindications for Ardha Matsyendrasana

Persons suffering from spinal injuries should not perform this asana. If you are having back pain, you can do this asana under the guidance and assistance of an expert yoga master.

Benefits of Ardha Matsyendrasana

Ardha Matsyendrasana stimulates the kidneys and liver, regulating their function. It energizes the spine, making it flexible but strong. It stretches your shoulders, neck and hips. This asana stimulates the digestive fire (Jaadaragni) in your abdomen and increases appetite and digestion. Ardha Matsyendrasana is a very good relief for menstrual discomfort, backache, sciatica and fatigue. It is therapeutically effective for infertility and asthma. Traditional texts on Hatha Yoga assert that Ardha Matsyendrasana can destroy most deadly diseases and awaken Kundalini.

Variation of Ardha Matsyendrasana

You can increase the intensity of Ardha Matsyendrasana by bending or straightening the knee based on comfort level. You can also enhance the effect of the asana by lifting your chest so that the spine gets straightened and stretched. If you find it difficult in the initial stages to perform this asana, you can decrease its intensity by keeping your foot on the inside portion of the knee. Otherwise, you can keep your lower leg straight and keep your upper foot on the outside or inside of your leg.

Preparatory and Follow-Up Asanas

The preparatory asanas for Ardha Matsyendrasana are Baddha Konasana, Janu Sirasasana, Virasana, Supta Padangustasana and Bharadvajasana, since they prepare your body for the intense twist required for this asana. The follow-up asanas for Ardha Matsyendrasana are Pashchimottasana and Janu Sirasasana and these asanas help in eliminating the stress that you experience in your various body parts due to the intensity of this asana. You should perform this asana as well as all other asanas only under the supervision and instructions of a trained yoga master until you achieve perfection in each asana.

Categories
Yoga

Paschimottanasana : Yoga Pose

Paschimottanasana or seated forward bending posture is a technically intense western stretch, since Paschima means west in Sanskrit and Uttana means  intense stretch. Paschimottanasana stretches the back portion of your body, mainly the spine, the hips and the back of the legs. If you face tightness in your hamstrings and are not able to stretch forward fully, do not force the upper body. You can use a thick blanket and sit on its edge to relieve the tension in the back and the legs, support your pelvis area, and keep your spine straight.

Procedure of Paschimottanasana

  1. You should sit on the floor with your buttocks having a support from a folded blanket and you should keep your legs stretched straight in front of your body. You should press the floor actively with your heels. Your toes should point towards the ceiling. You should inhale and raise your hands on your head, stretching and lengthening the spine. The palms should be kept apart by the length of your shoulders.
  2. You should exhale and bend your body forward from your hips, while stretching your hands towards your feet. If it is possible, try to catch your toes with your fingers. Initially, many people will find this difficult. You need no force yourself and you can catch hold of the sides of your feet or your legs as far away as possible. Slowly, you will be able to stretch your hands and catch your toes with your hands.
  3. You should drop your pelvis forward and further down so that the spine lengthens to the maximum extent without strain. You should keep your shoulders and neck relaxed. If possible, you can bend forward until your head is between your knees. Otherwise, bend your back to the maximum possible extent. Over time, the stretching will improve.Paschimottanasana Yoga Pose
  4. You should press forward with your heels and your head, while pressing back through your sitting bones.
  5. You can remain in this position for 15 seconds to 30 seconds initially. With practice, you will be able to remain in this position even for five minutes.
  6. You should slowly inhale and come back to the original sitting position.

Benefits of Paschimottanasana

Paschimottanasana calms your brain and relieves stress, as well as mild depression. This asana stretches your spine, shoulders and hamstrings fully. Further, it stimulates your liver, kidneys, uterus and ovaries. It improves digestion. Paschimottanasana relieves symptoms of menopause in women and reduces menstrual discomfort. It reduces fatigue and anxiety and soothes headaches. Paschimottanasana is highly therapeutic for insomnia, infertility, sinusitis and high blood pressure. It reduces obesity and abdominal fat. While Sarvangasana stimulates your endocrine glands, Paschimottanasana is best for stimulation of your abdominal viscera like liver, kidneys and pancreas. Since it increases the peristalsis of your bowels, the vermicular movement of your bowels and intestines through which the faecal and food matters are pushed in the bowels, it is a very good asana for constipation. Paschimottanasana is also a good cure for piles and diabetes. It tones up the hip muscles, the epigastric plexus of your nerves, the solar plexus of your nerves, the lumbar nerves, the sympathetic cord and bladder prostrate, keeping them in healthy and sound condition.

Precautions and Contraindications

Persons with asthma, diarrhea and back injury should not perform this asana. People with lower back problems or slipped discs should not do this asana. It is advisable to perform Paschimottanasana initially under the guidance of an experienced yoga master until you become perfect in this asana.

Variation of Paschimottanasana

You should lie down on the floor and bend your knees towards your torso while exhaling. Then you should inhale and extend your heels towards the ceiling. Slowly, you should swing your feet exhaling, so that they are above your head. Your pelvis should not lift much from the ground. This is known as Urdhva Mukha Paschimottanasana and it is different from Sarvangasana or Halasana.

Preparatory and Follow-Up Poses

You can perform Balasana, Janusirsasana and Uttanasana before Paschimottanasana and Ardha Matsyendrasana.

Swami Shivananda of Divine Life Society, Rishikesh, India, one of the first proponents of Ashtanga Yoga in the last century, used to stress repeatedly that just three asanas, namely Paschimottanasana, Sarvangasana and Sirasasana are enough to keep any person healthy and other asanas are not that important.

Categories
Yoga

Bakasana : Yoga Pose

Bakasana is termed as crane posture, since Baka means crane in Sanskrit. This is an advanced asana but a compact hand balancing asana. The focus of Bakasana is on the wrists and it strengthens the hands and abdominal organs, while stretching and increasing the flexibility of the spine.

Procedure for Bakasana

  1. You should assume a squatting position on a folded blanket or a yoga mat, maintaining equal distance between your knees, while keeping your feet flat on the ground. You should now place the palms of your hands between your knees flat on the floor and should maintain your knees and elbows steady at the same level.
  2. You should slowly bend your chest forward, while lifting both your legs carefully in such a manner that your entire body is balanced solely on your palms. When you have reached the correct position, your graze should be straight for balancing the body properly.
  3. You can hold this position as long as you are comfortable, preferably between 20 seconds and one minute and then return back slowly to your original position. The feet should go up and come down smoothly without any jerk.Bakasana Yoga Pose

Precautions and Contraindications for Bakasana

You should keep your neck straight in Bakasana for avoiding strains and sprains in the neck or back. People suffering from neck problems such as spondylosis should practice this asana only under the guidance of a qualified yoga master. People suffering from carpal tunnel syndrome in their wrists and pregnant women should not practice this asana.

Beginners should keep their heels and hips very close together when they tuck the body in tight. They can place the upper arms against their shins when lifting their feet off the ground for better support. The groin should be pushed into their pelvic region for better balancing. Further, it is advisable not to remain in this position for long, since the entire body weight is on the wrists and any strain can result in sprains or injuries. It is also possible that beginners will fall forward flat on their face in the initial stages. Hence, they should keep a large, thickly folded blanket on the ground that can absorb the impact of the fall. They can also use props or a partner in the beginning stages until they are comfortable on their own. If they feel pain in their wrists, they can curl their fingers inwards, which will reduce the pain.

Benefits of Bakasana

Bakasana strengthens the arms and the wrists. This asana stretches the upper back fully, increasing the elasticity and flexibility of the spine. It also tones up and strengthens all the muscles and organ in your abdominal region, while opening up your groin region. The sense of balance, coordination and balance will improve only if you practice this asana regularly.

Therapeutic Applications of Bakasana

Regular practice of Bakasana helps us in developing deeper trust in our body and mind concentration, balance and coordination, helping us in taking up new challenges in our lives. This asana creates a sense of positive thinking, while feelings of doubt and hesitation get considerably reduced. The functioning of our digestive systems gets improved substantially and problems such as acidity and heartburn get reduced.

Variation in Bakasana

The main variation in Bakasana is Parsva Bakasana or side crane posture. You should keep your knees together in this asana in the squatting position, as opposed to keeping them apart in normal Bakasana. You should exhale and turn your chest to the right and brace your left elbow to the outer portion of your right knee. Your upper arm should be very close to the armpit and the knee should be firm against your arm. You should place your hands on the ground with the palms flat and pressed to the ground. You should lift your feet while exhaling and leaning towards the right. The arms should remain as straight as possible. You can hold this position for about 30 seconds, return back to the original position and repeat it on the left side in the same manner. Parsva Bakasana is an intense asana requiring lots of practice and balance. It is an advanced asana and only highly trained yoga practitioners should attempt and get perfection in this asana.

Preparatory and Follow-Up Asanas for Bakasana

The preparatory asanas for Bakasana are Virasana, Adho Mukha Svanasana and Baddha Konasana, while the follow-up asanas are Chaturanga Dandasana and Adho Mukha Svanasana.

Categories
Yoga

Akarna Dhanurasana : Yoga Pose

Akarna Dhanurasana literally means ear bow pose, since Karna means ear in Sanskrit, while the prefix ‘A’ means near and Dhanur means bow. However, since the body of the practitioner resembles a bow and arrow or an archer aims to release an arrow from a bow, this asana is usually known shooting bow posture. The main purpose of the asana is to pull the foot near the ear to resemble an archer.

Procedure for Akarna Dhanurasana

  1. You should firmly in Dandasana on the ground and keep your legs straight out together in front of your body. The head, shoulders and back should remain straight while you are doing this.
  2. When you are fully comfortable in this position, you should keep your palms on the thighs, while inhaling deeply.
  3. You should slide down the right hand towards the big toe of the right foot. When you have caught hold of the toe, you should pull your right foot towards the face.
  4. At the same time, you should slide down the left hand to reach and catch the big toe of your left foot. They should remain firm on the ground.
  5. Now you should move your right foot along with your right hand from the front of your face towards your right ear.
  6. You can stay in this position for 15 seconds to one minute.Akarna Danurasana yoga pose
  7. You should return to your original position, while exhaling.
  8. You should repeat steps 3 to 7 with the left leg.
  9. You should repeat this posture at least twice for each leg for maximum effect.

Precautions and Contraindications for Akarna Dhanurasana

Beginners should not try this asana without the guidance and assistance of an expert yoga master. Since this asana belongs to the intermediate level category, the practitioner should do this asana only after mastering all the basic asanas and a few intermediate asanas. Pregnant women and persons suffering from spinal injuries should not perform this asana.

Benefits of Akarna Dhanurasana

The anatomical focus in Akarna Dhanurasana is on the thighs, groins, belly, chest, shoulders, neck, and spine. Hence, this asana strengthens the legs, builds up core muscles and improves concentration and grace. Akarna Dhanurasana improves digestion process, treats indigestion problems and clears constipation. It heals pain in lower abdomen areas and in the large intestines. This asana regularizes the menstrual cycle for the majority of women. Your breathing capacity becomes greatly enhanced when you perform Akarna Dhanurasana, since it expands the lungs and increases their oxygen holding capacity.

Variation in Akarna Dhanurasana

When you have become an expert in the basic Akarna Dhanurasana, you can use your left hand to pull your right leg to your right ear and the right hand to pull your left leg to your left ear. However, it is quite a complicated manoeuvre and you should perform this only under the supervision of your yoga master until you are able to perform this comfortably.

Preparatory and Follow-Up Asanas for Akarna Dhanurasana

The preparatory asanas for Akarna Dhanurasana are Virasana, Setu Bandha Sarvangasana, Bhujangasana and Urdhva Mukha Svanasana. The follow-up asanas are Supta Padangustasana and Ardha Matsyendrasana.