Ayurved Doctor

Categories
Yoga

Simhasana : Yoga Pose

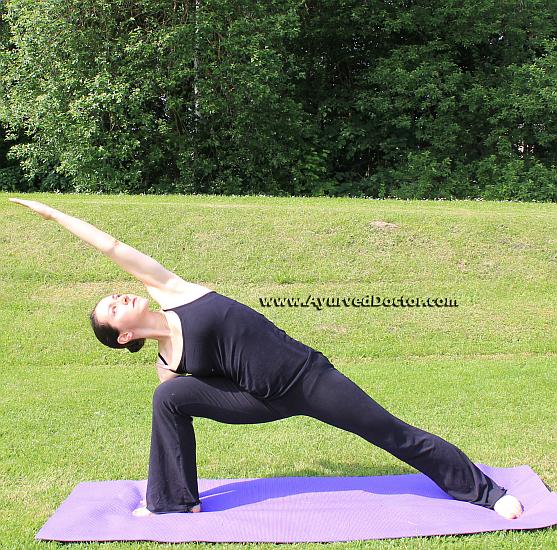
Simhasana is known as lion posture, since simha is lion in Sanskrit and this asana looks like a seated lion. The practitioner should modify the facial expressions to resemble the lion to get maximum effect from this asana. Simhasana is a sitting posture yoga exercise.

Procedure for Simhasana

  1. You should kneel on the ground and sit in the position of Vajrasana. You can either do this in Vajrasana position or you can cross the front portion of your right ankle over the back portion of your left ankle. In this position, the feet will be pointing out towards the sides. You should sit back, so that your perineum is positioned snugly down on the top heel, which will be the right heel.
  2. You should press the palms of your hands against your knees firmly. You should splay your fingers and fan the palms, so that they look like the sharp opened claws of the lion. While doing this, you should feel how the shoulder blades spread across your back and press it firmly, which lifts the position of your heart.
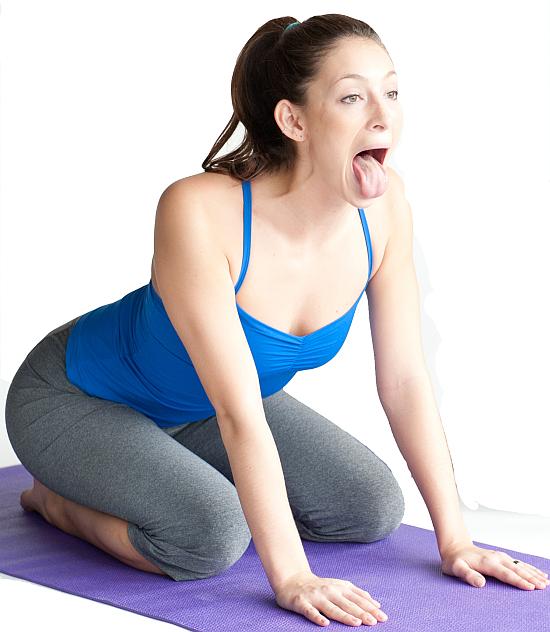
  3. In this position, you should inhale deeply through your nose. At the same time, you should open your mouth as wide as possible and stretch out your tongue, so that the tip of the tongue curls down towards your chin. You should keep your eyes wide open and contract the muscles in the front portion of your throat. You should now exhale slowly through the mouth with a unique ‘ha’ sound. The breath must pass over the back portion of your throat.
  4. For this asana, some yoga schools advice that your gaze should be bhru-madhya-drishti or mid-brow grazing, keeping your eyes focused between your eyebrows. Other yoga schools teach that the focus of the eyes should be the tip of your nose or nasa-agra-drishti.
  5. You can even roar like the lion two to three times. Then you should change the crossing of your legs and repeat this asana. You can do both positions any number of times as long as you are comfortable and does not feel any strain.

Simhasana yoga pose

Benefits of Simhasana

The anatomical focus of Simhasana is on the knees, ankle, diaphragm, abdomen, chest, hands and fingers. Simhasana relieves tension in your face and chest. Very few people are aware that Simhasana stimulates the platysma, which is a thin, fat and rectangular-shaped muscle situated on the front portion of the throat. When you contract the platysma, it puts a downward pulling pressure on the corners of your mouth, while the skin of the neck becomes wrinkled. This process of Simhasana keeps the platysma firm even when we age. Further, Simhasana is believed to destroy diseases, while facilitating the three major bandhas, namely, Mula Bandha, Jalandara Bandha and Uddiyana Bandha. Most yoga schools agree that Simhasana is highly effective for people suffering from stuttering or those with bad breath.

Precautions for Simhasana

You should be very cautious when you begin to sit in fixed-knee position, if you are suffering from any knee injury. In such a situation, you can sit in a chair and practise this asana.

Variation of Simhasana

You can sit in the position of Mandukasana or frog posture and sit back on the knees. The buttocks should be wiggled down towards the inner arches of your feet, so that they form a kind of saddle. You should now spread your knees as wide as possible, while the inner tips of the big toes are touching. You should lean your chest forward, while pressing the palms of your hands on the ground between your legs, with the fingers turned back to point at your pelvis. Your elbows should remain straight during this exercise. You should then perform step 4 described above.

Categories
Yoga

Marjaryasana : Yoga Pose

Marjaryasana is known as the cat posture, since Marja means cat in Sanskrit. It is a highly popular and frequently performed asanas in the world. The postures that we maintain in our daily lives determine our overall health and well-being. Marjaryasana is highly effective in correcting many of the wrong postures that we assume during many occasions, thereby enhancing our body health.

When the body is healthy, mind also functions clearly and remains active. However, you should practice this asana and other asanas under the guidance of an experienced yoga master, since performing the steps accurately is very important to obtain maximum benefits from each asana. Any wrong steps or movements will result only in pain or injury, which should be avoided. The movements in any asana should be smooth and slow, without any sudden or jerky movements.

Procedure for Marjaryasana

  1. You should first get yourself into a kind of table top position, keeping your hands and knees on the ground. The knees should be directly below your hips. The shoulders, elbows and wrists should be perpendicular to the ground and in a straight line with each other. You should keep your head in the center between your shoulder and the focus should be firmly locked on the ground.Marjaryasana yoga pose
  2. You should now exhale and raise the spine towards the ceiling by rounding it. Your hands and knees should remain in the original position and should not move during this exercise.
  3. You should release and lower your head towards the ground, but the chin should not touch your chest. You can remain in this posture as long as you feel comfortable.
  4. You should slowly return back to the original table top position while inhaling. You can repeat this asana any number of times you want.

Precautions and Contraindications for Marjaryasana

Marjaryasana may be easy for some people, but others may find it slightly difficult. Hence, you should ensure that you do not feel any pain or strain while doing this asana or any other asana. You should keep the movement within your ability and capacity and should never push beyond that limit. If you have been suffering from any head injury, you should not lower your head but keep it straight in line with your chest. You should always perform preparatory asanas, so that you are able to flex your body muscles when you perform each asana, especially the intermediate and advanced or tougher asanas.

Benefits of Marjaryasana

Marjaryasana provides sturdiness and overall durability to your spinal column. This asana not only plays a key role to correct the posture of an individual, but also invigorates the spine and internal organs. It relieves tension in the lower back. Very few people know that Marjaryasana also plays a significant role in purifying the blood and regulating the blood circulation in the human body. It is a very good stress releasing workout and hence, it is used widely as a very good stress reliever, since stress is one of the major issues in the lives of most of us.

Variation in Marjaryasana

While remaining in Marjaryasana, you can turn your head to focus the eyes on your left hip, while moving the hip slightly towards your head. You should repeat it towards the right side, but you should breathe in before changing the position. You can do this variation for 10 or 15 breaths. You can also move your hands to a more forward direction and move the hips in a slow circular motion.

Preparatory and Follow-Up Asanas for Marjaryasana

The preparatory asanas for Marjaryasana are Balasana and Garudasana. The follow-up asana is Gomukhasana but your yoga master will be able to teach you other preparatory and follow-up asanas.

Categories
Yoga

Ardha Matsyendrasana : Yoga Pose

Ardha Matsyendrasana is known as the half lord of the fish posture, since Ardha in Sanskrit means half, Matsya means fish and Indra is divine ruler. Matsyendra was a legendary Yogi, who taught this asana first to Hatha Yoga students. It is believed that Yogi Matsyendra was a disciple of Lord Shiva.

Once Lord Shiva went to a lonely island with his consort, Goddess Parvati and he taught her the mysteries of Hatha Yoga there. A fish swimming at the shore nearby heard all the teachings of Lord Shiva and Shiva recognized this. He took mercy on the fish and sprinkled holy water on the fish. By the grace of Shiva, the fish became a Yogi with a divine body and earned the name Matsyendra. This asana is a half posture and a spinal twist asana.

Procedure for Ardha Matsyendrasana

  1. You should sit with your legs straight on a blanket or a yoga mat and the legs should be spread outwards. You could use an additional folded blanket to support your buttocks for more comfort.
  2. You should now slowly slide the left foot under the right leg, so that you are able to reach the outside of your right hip with the left foot. You should keep the outside of your left leg on the ground after sliding it.
  3. You should now cross the right leg over your left leg so that it stands on the floor outside the left hip. The right knee should be pointing towards the ceiling.Ardha Matsyendrasana Yoga Pose
  4. You should keep your right hand behind your buttocks and press it on the ground. Simultaneously, you should twist towards the direction of the inner portion of your right thigh, while exhaling. Your left upper arm should rest on your right knee pointing towards the ceiling. You should pull your chest and the right thigh together.
  5. You should press your inner right foot into the ground, while releasing your right groin simultaneously. You should also lengthen your right chest area. You should continue the lengthening of your tailbone, while leaning the upper chest slightly backwards.
  6. You can turn your head either towards the right or left. You can continue to twist your chest with the head or you can counter twist the chest in the opposite direction. You should be looking over your left shoulder towards your right foot if you are turning your head towards the left.
  7. You should lift a little through your sternum with each inhaling breath. You can press your fingers against the ground for support. You should more with each exhalation. You should ensure the twist is spread evenly throughout your spine, instead of getting concentrated in any specific area of your spine. You can stay in this pose between 30 seconds to a minute and slowly release the position with exhalation to return to the original position.
  8. You should repeat this asana for your left side and follow the same procedure.

Precautions and Contraindications for Ardha Matsyendrasana

Persons suffering from spinal injuries should not perform this asana. If you are having back pain, you can do this asana under the guidance and assistance of an expert yoga master.

Benefits of Ardha Matsyendrasana

Ardha Matsyendrasana stimulates the kidneys and liver, regulating their function. It energizes the spine, making it flexible but strong. It stretches your shoulders, neck and hips. This asana stimulates the digestive fire (Jaadaragni) in your abdomen and increases appetite and digestion. Ardha Matsyendrasana is a very good relief for menstrual discomfort, backache, sciatica and fatigue. It is therapeutically effective for infertility and asthma. Traditional texts on Hatha Yoga assert that Ardha Matsyendrasana can destroy most deadly diseases and awaken Kundalini.

Variation of Ardha Matsyendrasana

You can increase the intensity of Ardha Matsyendrasana by bending or straightening the knee based on comfort level. You can also enhance the effect of the asana by lifting your chest so that the spine gets straightened and stretched. If you find it difficult in the initial stages to perform this asana, you can decrease its intensity by keeping your foot on the inside portion of the knee. Otherwise, you can keep your lower leg straight and keep your upper foot on the outside or inside of your leg.

Preparatory and Follow-Up Asanas

The preparatory asanas for Ardha Matsyendrasana are Baddha Konasana, Janu Sirasasana, Virasana, Supta Padangustasana and Bharadvajasana, since they prepare your body for the intense twist required for this asana. The follow-up asanas for Ardha Matsyendrasana are Pashchimottasana and Janu Sirasasana and these asanas help in eliminating the stress that you experience in your various body parts due to the intensity of this asana. You should perform this asana as well as all other asanas only under the supervision and instructions of a trained yoga master until you achieve perfection in each asana.

Categories
Yoga

Paschimottanasana : Yoga Pose

Paschimottanasana or seated forward bending posture is a technically intense western stretch, since Paschima means west in Sanskrit and Uttana means  intense stretch. Paschimottanasana stretches the back portion of your body, mainly the spine, the hips and the back of the legs. If you face tightness in your hamstrings and are not able to stretch forward fully, do not force the upper body. You can use a thick blanket and sit on its edge to relieve the tension in the back and the legs, support your pelvis area, and keep your spine straight.

Procedure of Paschimottanasana

  1. You should sit on the floor with your buttocks having a support from a folded blanket and you should keep your legs stretched straight in front of your body. You should press the floor actively with your heels. Your toes should point towards the ceiling. You should inhale and raise your hands on your head, stretching and lengthening the spine. The palms should be kept apart by the length of your shoulders.
  2. You should exhale and bend your body forward from your hips, while stretching your hands towards your feet. If it is possible, try to catch your toes with your fingers. Initially, many people will find this difficult. You need no force yourself and you can catch hold of the sides of your feet or your legs as far away as possible. Slowly, you will be able to stretch your hands and catch your toes with your hands.
  3. You should drop your pelvis forward and further down so that the spine lengthens to the maximum extent without strain. You should keep your shoulders and neck relaxed. If possible, you can bend forward until your head is between your knees. Otherwise, bend your back to the maximum possible extent. Over time, the stretching will improve.Paschimottanasana Yoga Pose
  4. You should press forward with your heels and your head, while pressing back through your sitting bones.
  5. You can remain in this position for 15 seconds to 30 seconds initially. With practice, you will be able to remain in this position even for five minutes.
  6. You should slowly inhale and come back to the original sitting position.

Benefits of Paschimottanasana

Paschimottanasana calms your brain and relieves stress, as well as mild depression. This asana stretches your spine, shoulders and hamstrings fully. Further, it stimulates your liver, kidneys, uterus and ovaries. It improves digestion. Paschimottanasana relieves symptoms of menopause in women and reduces menstrual discomfort. It reduces fatigue and anxiety and soothes headaches. Paschimottanasana is highly therapeutic for insomnia, infertility, sinusitis and high blood pressure. It reduces obesity and abdominal fat. While Sarvangasana stimulates your endocrine glands, Paschimottanasana is best for stimulation of your abdominal viscera like liver, kidneys and pancreas. Since it increases the peristalsis of your bowels, the vermicular movement of your bowels and intestines through which the faecal and food matters are pushed in the bowels, it is a very good asana for constipation. Paschimottanasana is also a good cure for piles and diabetes. It tones up the hip muscles, the epigastric plexus of your nerves, the solar plexus of your nerves, the lumbar nerves, the sympathetic cord and bladder prostrate, keeping them in healthy and sound condition.

Precautions and Contraindications

Persons with asthma, diarrhea and back injury should not perform this asana. People with lower back problems or slipped discs should not do this asana. It is advisable to perform Paschimottanasana initially under the guidance of an experienced yoga master until you become perfect in this asana.

Variation of Paschimottanasana

You should lie down on the floor and bend your knees towards your torso while exhaling. Then you should inhale and extend your heels towards the ceiling. Slowly, you should swing your feet exhaling, so that they are above your head. Your pelvis should not lift much from the ground. This is known as Urdhva Mukha Paschimottanasana and it is different from Sarvangasana or Halasana.

Preparatory and Follow-Up Poses

You can perform Balasana, Janusirsasana and Uttanasana before Paschimottanasana and Ardha Matsyendrasana.

Swami Shivananda of Divine Life Society, Rishikesh, India, one of the first proponents of Ashtanga Yoga in the last century, used to stress repeatedly that just three asanas, namely Paschimottanasana, Sarvangasana and Sirasasana are enough to keep any person healthy and other asanas are not that important.

Categories
Yoga

Bakasana : Yoga Pose

Bakasana is termed as crane posture, since Baka means crane in Sanskrit. This is an advanced asana but a compact hand balancing asana. The focus of Bakasana is on the wrists and it strengthens the hands and abdominal organs, while stretching and increasing the flexibility of the spine.

Procedure for Bakasana

  1. You should assume a squatting position on a folded blanket or a yoga mat, maintaining equal distance between your knees, while keeping your feet flat on the ground. You should now place the palms of your hands between your knees flat on the floor and should maintain your knees and elbows steady at the same level.
  2. You should slowly bend your chest forward, while lifting both your legs carefully in such a manner that your entire body is balanced solely on your palms. When you have reached the correct position, your graze should be straight for balancing the body properly.
  3. You can hold this position as long as you are comfortable, preferably between 20 seconds and one minute and then return back slowly to your original position. The feet should go up and come down smoothly without any jerk.Bakasana Yoga Pose

Precautions and Contraindications for Bakasana

You should keep your neck straight in Bakasana for avoiding strains and sprains in the neck or back. People suffering from neck problems such as spondylosis should practice this asana only under the guidance of a qualified yoga master. People suffering from carpal tunnel syndrome in their wrists and pregnant women should not practice this asana.

Beginners should keep their heels and hips very close together when they tuck the body in tight. They can place the upper arms against their shins when lifting their feet off the ground for better support. The groin should be pushed into their pelvic region for better balancing. Further, it is advisable not to remain in this position for long, since the entire body weight is on the wrists and any strain can result in sprains or injuries. It is also possible that beginners will fall forward flat on their face in the initial stages. Hence, they should keep a large, thickly folded blanket on the ground that can absorb the impact of the fall. They can also use props or a partner in the beginning stages until they are comfortable on their own. If they feel pain in their wrists, they can curl their fingers inwards, which will reduce the pain.

Benefits of Bakasana

Bakasana strengthens the arms and the wrists. This asana stretches the upper back fully, increasing the elasticity and flexibility of the spine. It also tones up and strengthens all the muscles and organ in your abdominal region, while opening up your groin region. The sense of balance, coordination and balance will improve only if you practice this asana regularly.

Therapeutic Applications of Bakasana

Regular practice of Bakasana helps us in developing deeper trust in our body and mind concentration, balance and coordination, helping us in taking up new challenges in our lives. This asana creates a sense of positive thinking, while feelings of doubt and hesitation get considerably reduced. The functioning of our digestive systems gets improved substantially and problems such as acidity and heartburn get reduced.

Variation in Bakasana

The main variation in Bakasana is Parsva Bakasana or side crane posture. You should keep your knees together in this asana in the squatting position, as opposed to keeping them apart in normal Bakasana. You should exhale and turn your chest to the right and brace your left elbow to the outer portion of your right knee. Your upper arm should be very close to the armpit and the knee should be firm against your arm. You should place your hands on the ground with the palms flat and pressed to the ground. You should lift your feet while exhaling and leaning towards the right. The arms should remain as straight as possible. You can hold this position for about 30 seconds, return back to the original position and repeat it on the left side in the same manner. Parsva Bakasana is an intense asana requiring lots of practice and balance. It is an advanced asana and only highly trained yoga practitioners should attempt and get perfection in this asana.

Preparatory and Follow-Up Asanas for Bakasana

The preparatory asanas for Bakasana are Virasana, Adho Mukha Svanasana and Baddha Konasana, while the follow-up asanas are Chaturanga Dandasana and Adho Mukha Svanasana.

Categories
Yoga

Akarna Dhanurasana : Yoga Pose

Akarna Dhanurasana literally means ear bow pose, since Karna means ear in Sanskrit, while the prefix ‘A’ means near and Dhanur means bow. However, since the body of the practitioner resembles a bow and arrow or an archer aims to release an arrow from a bow, this asana is usually known shooting bow posture. The main purpose of the asana is to pull the foot near the ear to resemble an archer.

Procedure for Akarna Dhanurasana

  1. You should firmly in Dandasana on the ground and keep your legs straight out together in front of your body. The head, shoulders and back should remain straight while you are doing this.
  2. When you are fully comfortable in this position, you should keep your palms on the thighs, while inhaling deeply.
  3. You should slide down the right hand towards the big toe of the right foot. When you have caught hold of the toe, you should pull your right foot towards the face.
  4. At the same time, you should slide down the left hand to reach and catch the big toe of your left foot. They should remain firm on the ground.
  5. Now you should move your right foot along with your right hand from the front of your face towards your right ear.
  6. You can stay in this position for 15 seconds to one minute.Akarna Danurasana yoga pose
  7. You should return to your original position, while exhaling.
  8. You should repeat steps 3 to 7 with the left leg.
  9. You should repeat this posture at least twice for each leg for maximum effect.

Precautions and Contraindications for Akarna Dhanurasana

Beginners should not try this asana without the guidance and assistance of an expert yoga master. Since this asana belongs to the intermediate level category, the practitioner should do this asana only after mastering all the basic asanas and a few intermediate asanas. Pregnant women and persons suffering from spinal injuries should not perform this asana.

Benefits of Akarna Dhanurasana

The anatomical focus in Akarna Dhanurasana is on the thighs, groins, belly, chest, shoulders, neck, and spine. Hence, this asana strengthens the legs, builds up core muscles and improves concentration and grace. Akarna Dhanurasana improves digestion process, treats indigestion problems and clears constipation. It heals pain in lower abdomen areas and in the large intestines. This asana regularizes the menstrual cycle for the majority of women. Your breathing capacity becomes greatly enhanced when you perform Akarna Dhanurasana, since it expands the lungs and increases their oxygen holding capacity.

Variation in Akarna Dhanurasana

When you have become an expert in the basic Akarna Dhanurasana, you can use your left hand to pull your right leg to your right ear and the right hand to pull your left leg to your left ear. However, it is quite a complicated manoeuvre and you should perform this only under the supervision of your yoga master until you are able to perform this comfortably.

Preparatory and Follow-Up Asanas for Akarna Dhanurasana

The preparatory asanas for Akarna Dhanurasana are Virasana, Setu Bandha Sarvangasana, Bhujangasana and Urdhva Mukha Svanasana. The follow-up asanas are Supta Padangustasana and Ardha Matsyendrasana.

Categories
Yoga

Sasankasana : Yoga Pose

Sasankasana is also known as rabbit posture or hare posture, since Sasanka means rabbit or hare in Sanskrit. The final posture of this asana resembles a leaping rabbit or hare. However, a few other schools term this as moon posture or crescent moon posture, since Sasanka also means moon in Sanskrit.

Procedure for Sasankasana

  1. You should sit in Vajrasana.
  2. You should keep your knees together on the floor.
  3. The weight of your body should be resting on your heels.
  4. The soles of your feet should be turned away from your body.
  5. You should inhale slowly, while raising both your hands straight above the head.
  6. The palms of the hands should be turned outward and the inside of your hands should be touching your ears.
  7. You should now lean backwards as much as possible.
  8. You should exhale, while bending and lowering the trunk and pelvis forward. When you are doing this, the hands should remain straight touching your ears and your seating position should be firm.
  9. You should bend forward and bring your hands and head fully forward until your hands are touching the floor and then your forehead rests on the floor.
  10. You should move your palms along the ground, so that your hands get maximum stretch.
  11. You should keep the palms together and straight, while your abdomen presses on your thighs. You can also interlock the palms and deepen the stretch of your hands.
  12. You should hold your breath and remain in this asana as long as you are quite comfortable.
  13. You should inhale slowly and return to the original position of Vajrasana, with the hands touching your ears and maintaining the seated position before repeating the asana for 2-3 more times.
  14. When you have completed this asana, you can bring down your hands and remain in Vajrasana for a few minutes.

Sasankasana yoga pose

Benefits of Sasankasana

Sasankasana provides a toned abdomen. It improves digestion and removes constipation. The spinal muscles get toned up. Sasankasana relieves neck pain. The upper back, hands and shoulders get fully stretched in this asana. It strengthens your knees and ankles. It refreshes the brain. Sasankasana can relieve many spinal problems. This asana is a very good treatment for persons with dropping the shoulders and correcting their posture. It is possible to cure slipped disc, if you practice this asana under the guidance of an expert yoga master.

Variation of Sasankasana

From your stretched position with the forehead and palms pressing the floor, you could lift your back and knees, so that your knees are in an upright position and your back is raised from the floor and inclines slightly forward, while your forehead is touching the floor. In this position, you should raise your hands until they are interlocked about your upper back. You can hold this position for 15 to 30 seconds and return to standard Sasankasana. You can also do this from a position where you are standing on your knees.

This variation of Sasankasana helps in reducing mental fatigue and refreshing the brain, since more blood gets pumped to your face and brain. Your back, spine and nervous systems obtain greater flexibility. This variation helps in curing sinus problems, chronic tonsillitis and colds. It also improves your digestion.

Categories
Yoga

Halasana : Yoga Pose

Halasana is known as plough posture, since your body will take the shape of a plough when you practise this. The Sanskrit word for plough is hala.

Procedure for Halasana

  1. You should spread a blanket on the floor and lie flat on your back. The hands should be kept at your sides on the floor with your palms touching the ground. Your legs should remain joined.
  2.  You should now lift your legs upward very slowly. The legs should remain straight without any bending and the hands should be firmly on the floor. The trunk also should not bend. You should raise your legs until they are at an obtuse angle.
  3.  From that position, you should proceed further to fold the legs over your body and lower your legs until they are away from your head and the toes touch the ground. The knees should remain straight and very close together. The back should be straight with only the neck and the head touching the floor. The thighs and legs should be in a straight line.
  4. You should press the chin against your chest and slowly breathe through your nose. The breathing should not be through the mouth.
  5. You can hold this position as long as possible.
  6.  You should slowly raise your legs and return to your original posture of lying on your back on the floor. There should be no jerk anywhere when you take your legs behind your head or when you bring them back to the original position.

Halasana Yoga pose by a lady

Benefits of Halasana

The focus of Halasana is on the thyroid. This asana calms your brain, stimulates your thyroid gland and abdominal organs. Halasana stretches your spine and shoulders. It helps in relieving symptoms of menopause. Halasana reduces fatigue and stress significantly. Halasana is therapeutically helpful for insomnia, headache, backache, infertility, and sinusitis. It tones up and nourishes the muscles of your thighs, muscles of your abdomen, and the rectal muscles. Halasana also cures chronic or habitual constipation, congestion, gulma, corpulence or obesity and enlargement of the spleen and liver. If you practice Halasana, you will feel very active and never be lazy.

Halasana tones the muscles in your back, the spinal nerves, the vertebral bones and all sympathetic nervous systems running along your vertebral column on both sides. When you do this asana, a higher quantity of blood flows through the spinal cord, muscles of the back, spinal roots of the nerves, sympathetic nerves and sympathetic ganglia, so that they get thorough nourishment. The vertebral column becomes highly elastic and soft. Further, Halasana prevents early ossification of your vertebral bones or faster degeneration of these bones. Early ossification will make you look older and the bones will become brittle and hard in this degenerative process. Halasana is a good cure for different types of myalgia or muscular rheumatism, sprain, neuralgia and lumbago also. Doing this asana under the guidance of an experienced yoga master is advisable.

Precautions and Contraindications

People suffering from diarrhoea, neck injuries, high blood pressure, and asthma should not practise this asana. Women should not perform Halasana during the menstruation period. Pregnant women can continue this asana if they have been practising it before becoming pregnant but it is not advisable. Since Halasana is an advanced asana, it is better if you become perfect in Sarvangasana before proceeding from that to Halasana, since it is an amplification of Sarvangasana.

Variations

Instead of keeping your hands in the original position, you can move them towards your legs and catch hold of the toes. You should do this also without any jerk.

One major variation of Halasana is Parsva Halasana or flank plough posture. In the Halasana posture, you should walk your feet towards your left side as far as possible, while exhaling. When you do this, one of your hips may tend to sink towards the ground. Hence, you should try and keep your pelvis in a neutral position, with the hips remaining parallel to the ground. You can remain in that position between 30 seconds and 1 minute. You can return back to Halasana position inhaling. You can now repeat this towards the right side and return back. From that position, you can release yourself from Halasana through step 6.

Categories
Yoga

Sarvangasana : Yoga Pose

Sarvangasana is a very powerful, even a mysterious asana that provides wonderful benefits. Since Sarva means all and Anga means limbs or members of our body, this posture can be termed as all members’ posture. When you perform this asana, all your body parts are engaged.

Procedure of Sarvangasana

  1. You should spread a thick blanket on the ground and practice Sarvangasana over the blanket. You should lie down flat on your back. Your legs should be close together.
  2. You should slowly lift your legs. The legs, hips and trunk should rise slowly until they are vertical to the floor. You should support your back with your two hands, one for each side, with the forearms and the elbows resting on the floor.
  3. You should press your chin against your chest, forming a firm chin-lock or Jalandara Bandha. The head, the neck, the shoulder portion and the top of the back should be touching the ground. You should concentrate on your thyroid gland lying on the front lower part of your neck.
  4. The legs should be kept straight and you should not allow the body to move to and fro or shake. The shoulders will be bearing the whole weight of your body as if you are standing on your shoulders with the support and help of your elbows.
  5. After holding the position as long as possible, you should slowly come back to the original lying down position. The forward and reverse movements of the legs should be smooth and elegant without any jerks. You can remain for 2 minutes in this asana position in the beginning, but you can later extend it to even half an hour.
  6. It is always advisable to do Matsyasana or fish posture immediately after performing Sarvangasana. You can do Sarvangasana twice a day, in the mornings and in the evenings.

Sarvangasana yoga pose

Benefits of Sarvangasana

Sarvangasana nourishes the thyroid gland properly, which has got a major role in our body metabolism, structure, nutrition and growth. When the thyroid gland is healthy, the circulatory, alimentary, respiratory, nervous, and genitor-urinary systems also function in a healthy manner. The thyroid gland operates in conjunction with the other ductless glands, like pineal gland in the brain, pituitary gland, suprarenal gland above your kidneys, testes, liver, and spleen. All these glands will suffer if the thyroid gland becomes diseased.

Sarvangasana supplies a larger quantity of blood to the roots of spinal nerves. It centralizes the blood in your spinal column and nourishes it beautifully. It keeps the spine fully elastic, making you look youthful. It prevents ossification or hardening of the bones. Sarvangasana is also helpful in maintaining Brahmacharya. It is the cheapest readily available tonic for blood, nerves and digestive system, saving your doctor’s bills. It also helps in venereal diseases like gonorrhoea and diseases of ovaries and bladder. It removes diseases of wombs and sterility. Sarvangasana also removes chronic constipation, dyspepsia and other gastro-intestinal disorders. It invigorates, energizes, rejuvenates and vivifies you and your entire body and mind.

Precautions and Contraindications

People suffering from diarrhoea, high blood pressure, headache, menstruation and neck injury should not practice Sarvangasana. This asana is an advanced asana and pregnant women should not practice it. It is better to do this asana under the guidance of an expert yoga master until you become perfect.

Variations of Sarvangasana

Sarvangasana is also known as Salamba Sarvangasana or supported all-members’ posture, since you use your hands as support while performing this. It is also possible to do it without the support of the hands and it is known as Nirlamba Sarvangasana. However, you should not attempt that until you have become perfect in Salamba Sarvangasana.

One more variation of Sarvangasana is Eka Pada Sarvangasana or one leg all-members’ posture. In this variation, after getting into the perfect Sarvangasana position, you can lower your right leg perpendicular to your body slowly until it touches the floor. You can remain in that position for up to 30 seconds and then bring the right leg back. You can then do the same with the left leg.

You can also do Padmasana while remaining in Sarvangasana position. You can deepen that posture by bending your legs towards your groin, while remaining in Sarvangasana and Padmasana positions.

Preparatory and Follow-Up Postures for Sarvangasana

You can perform Virasana and Setu Bandha Sarvangasana before doing Sarvangasana. Proceeding to Halasana from Sarvangasana is quite easy. You should compulsorily do Matsyasana after completing Sarvangasana.

Categories
Yoga

Parsvakonasana : Yoga Pose

Parsvakonasana is usually termed as Utthita Parsvakonasana or extended side angled pose. This asana is highly useful in stretching the body parts that are not usually fully stretched. This is one of the beginning asanas but you have to practise this slowly in the beginning until your body becomes accustomed to stretch fully without any strain.

Procedure for Parsvakonasana

  1. Parsvakonasana can be started from Tadasana or the mountain pose. You should stand straight with palms of both hands facing outward and both feel adjacent to one another.
  2. You should exhale slowly while separating your feet until they are separated by about three feet distance.
  3. You should now raise your hands so that they are at the sides fully stretched and parallel to the floor. In this position, your shoulders should remain wide, the feet should be kept apart and the palms facing down.
  4. You should slightly turn your left foot towards the left side, while the right foot still faces forward.
  5. You should turn the left thigh inwards until the ankle and the center of your left knee of your left foot are in a straight line.
  6. You should then turn the hip slightly towards your left leg but your chest should remain straight.
  7. You should bend the left knee over your left ankle while inhaling, so that your shin is perpendicular to the floor.
  8. The left thigh should also remain parallel to the ground with the right leg remaining straight and stretched fully from hip to ankle.
  9. You should now extend and stretch the right hand above your head on the left side of your body, with the palm facing the ground and remaining straight. The hand should be touching your right ear.
  10. You should turn your face slowly inward to look at your palm. The other hand should be touching the ankle of your left leg without taking any support from the ankle or the shoulder. The purpose of Parsvakonasana is to stretch as much towards the right side of your body as possible without feeling any discomfort.
  11. You should push your extended hand towards the ceiling forcefully, while inhaling and exhaling. You can do this stretching a few times and then return back to standing position.
  12. You should repeat the same steps with the right leg.

Parsvakonasana Yoga Pose a very useful yoga pose incase of insomnia

Precautions in Practising Parsvakonasana

You should not do Parsvakonasana if you have problems of insomnia, headaches or other conditions directly related to hypertension or high blood pressure. You should skip looking at your palm of your extended hand, if you have neck problems or neck pain, but should look straight while practicing this asana.

Benefits of Parsvakonasana

Parsvakonasana stretches out several parts of your body and helps in stretching the muscles of legs, ankles, hips, groin, abdomen, lungs, chest, shoulders and spine. The knees, legs and ankles get strengthened. Parsvakonasana enhances overall stamina by stimulating the abdominal organs. Parsvakonasana is helpful in constipation, infertility, chronic back pain, weak backs, osteoporosis and discomfort during menstruation period. It is also a very good remedy for highly painful inflammation of the sciatica nerve.

Variations of Parsvakonasana

You can use the wall to vary the posture of the asana. You can bend your arm towards the knee and the ankle instead of using the hand. This variation will stretch the inner thigh and groin to a higher degree. Another major variation of Parsvakonasana is Parivrtta Parsvakonasana or resolved side angle posture. This asana is not for beginners and hence you should practise this only after you are perfect with Utthita Parsvakonasana. In this pose, you should exhale and stretch your hand until you are able to place it on the ground next to your leg, instead of touching the ankle position in Parsvakonasana. You should twist your body and chest slightly towards both sides to increase the stretch.

Preparatory and Follow-Up Asanas for Parsvakonasana

You can practise Adho Mukha Svanasana, Supta Baddha Konasana, Prasarita Padottanasana, Supta Virasana, Supta Padangustasana, Upavista Konasana, Utthita Trikonasana, Virasana, Virabhadrasana II and Siddhasana before starting on Parsvakonasana. You can follow up Parsvakonasana with Baddha Konasana, Bakasana and Malasana. The follow-up asanas for Parivrtta Parsvakonasana are Garudasana, Gomukhasana, Bharadvajasana and Marichyasana III.